- Get A Free Consultation.
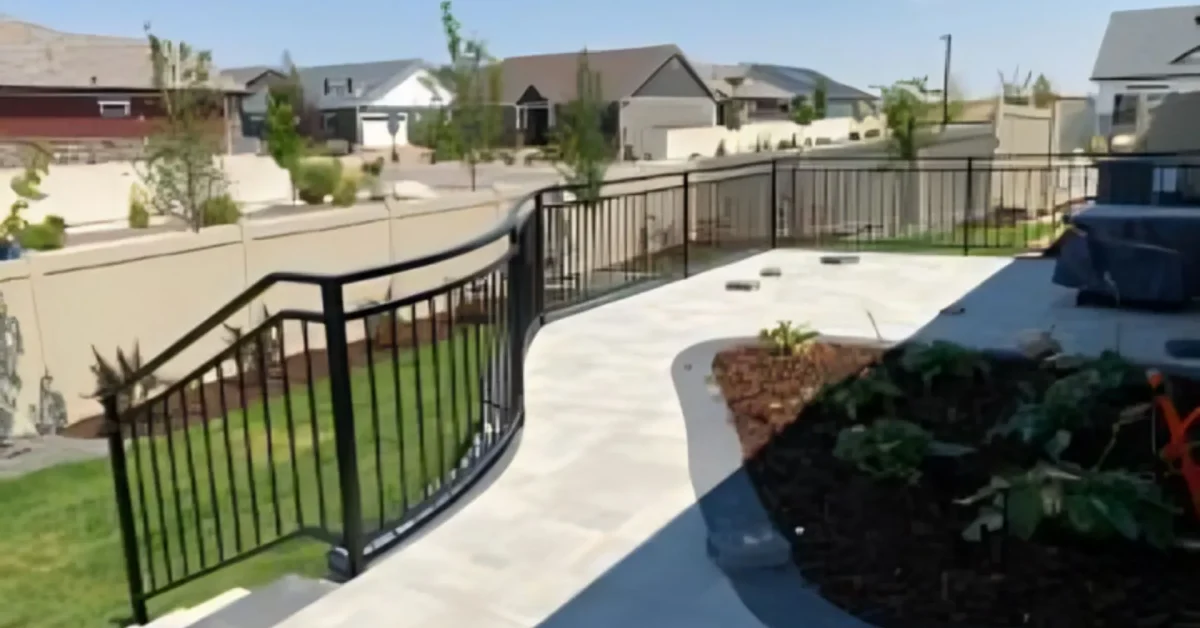
A curved walkway does more for a yard’s overall feel than a straight one ever will. It slows down the eye, works with existing landscaping instead of cutting through it, and often just fits the natural shape of a yard better than a rigid straight line would. The tradeoff is that curves are genuinely harder to execute well. Every paver along the curve needs some adjustment, and small errors that would be invisible on a straight walkway become obvious once you’re following an arc.
At Ridgewell Landscape and Design, we build curved walkways across the Denver area, including Broomfield, Parker, and the surrounding communities, and this is one of the more technically demanding walkway styles we install. This guide covers the two main ways to create a curve, cutting pavers to follow a precise arc, or using smaller units and pattern choices to create a curved look with less cutting, along with the layout, base, and cost considerations specific to curved designs.
| Approach | Best For | Cutting Required | Visual Result |
| Cut pavers to follow the arc | Precise, tight curves | High | Clean, exact curve line |
| Smaller pavers or curve-friendly patterns | Gentle, sweeping curves | Low to moderate | Slightly more organic, less exact edge |
Cutting standard rectangular pavers to follow an arc gives you the most control over exactly where the curve sits, which matters for tighter curves or when the walkway needs to follow a specific path around a fixed feature like a tree or garden bed. Using smaller pavers, like cobble-style units, or choosing a pattern that naturally accommodates gentle curves reduces the amount of cutting significantly, but works best on broader, more relaxed curves rather than tight turns.
Before any digging happens, mark your intended curve using a garden hose or a length of rope laid directly on the ground. This lets you walk the line, view it from different angles, including from inside the house or from the street, and adjust the shape before it becomes permanent. A curve that looks right on paper often needs tweaking once it’s actually laid out in three dimensions.
A gentle, sweeping curve is both easier to build and generally more visually pleasing than a tight, aggressive one. If your layout has a curve radius smaller than roughly 3 feet, expect significantly more cutting and a more technically demanding installation. Where possible, widen the curve’s radius slightly rather than forcing a tight turn, unless the layout is working around a fixed obstacle that requires it.
Curved walkways use more pavers per square foot of actual walking surface than straight ones, since cut pieces generate waste and the outer edge of a curve covers more ground than the inner edge for the same walkway width. Budget for 15 to 20 percent extra material on a curved design, higher than the 5 to 10 percent typically set aside for a straight walkway.
Once your rough layout is set, mark the precise inner and outer edges of the curve using stakes and a flexible line, spaced at consistent intervals matching your walkway’s width. This gives you two clear boundary lines to work within as you lay and cut pavers.
Place full, uncut pavers along the curve first, without adhesive or final positioning, to see how they naturally sit against the arc. This dry layout reveals exactly where gaps will need cut pieces and roughly what size those cuts need to be, before you commit to cutting a single paver.
Each gap along a curve is typically a slightly different size and angle, which means cutting pavers one at a time to fit its specific space rather than cutting a batch of identical pieces in advance. Mark each cut directly against the gap it’s filling, then cut with a paver saw for the cleanest edge. This is the most time-consuming part of a curved installation, and it’s where rushing tends to produce a visibly uneven curve line.
Joint spacing naturally wants to pinch tighter on the inside of a curve and stretch wider on the outside. Pay close attention to keeping joints within a reasonable, consistent range on both sides, since joints that vary too dramatically along the curve are one of the more noticeable signs of an inexperienced installation.
Smaller pavers, like cobble-style units roughly 4 by 4 inches or smaller, naturally follow a gentle curve with far less cutting than larger rectangular pavers, since more, smaller units can shift slightly at each joint to accommodate the arc without needing precise cuts.
Certain patterns lend themselves to curves better than others. A running bond pattern using smaller units can sweep along a gentle curve reasonably well, while herringbone and basketweave are considerably harder to bend around a curve without extensive cutting, since their interlocking geometry assumes straight, consistent rows.
This approach trades some precision for speed and reduced material waste. The outer edge of the walkway will read as a smooth curve overall, but won’t have the exact, crisp line that comes from individually cut pavers. For many yards, especially those with a more relaxed, garden-path feel, this reads as an appropriate stylistic choice rather than a shortcut.
Base work for a curved walkway follows the same core principles as a straight one, proper depth, thorough compaction in layers, but requires extra attention along the curve itself. Compact in shorter passes when working around a curve rather than long straight runs with the plate compactor, since a tight curve is harder to fully compact evenly in a single long pass. Our guide to proper paver base depth covers general base fundamentals that still apply here, adjusted for the tighter, more segmented compaction a curve requires.
Edge restraints also need special attention on curves. Standard rigid edge restraints don’t bend, so curved sections typically require flexible edge restraint material designed specifically for curves, or more frequent anchoring points using standard restraints cut into shorter segments that approximate the curve.
Curved walkways generally cost more than straight ones of the same length and width, mainly due to the extra material waste from cuts and the additional labor time required for individual paver fitting. Expect a curved design to run somewhere between 15 and 30 percent higher than an equivalent straight walkway, with tighter curves and more intricate patterns landing toward the higher end of that range. Our paver walkway cost guide covers general per square foot pricing for straight walkways, which serves as a useful baseline before adding the curve premium on top.
The curve-friendly pattern approach using smaller pavers tends to close some of this cost gap compared to precisely cut curves, since it reduces both wasted material and labor hours, though it won’t fully eliminate the added cost of a curved layout compared to a straight one.
Curves add a layer of difficulty that goes beyond most DIY skill levels comfortable with a straight walkway. Every cut is unique, joint spacing has to be actively managed rather than relying on built-in paver spacers, and the base and edge restraint work requires techniques that don’t come up at all on a flat, straight path. A curve that’s laid slightly wrong doesn’t always fail structurally the way a poorly based straight walkway might, but it very often looks wrong, uneven joint lines, a wavy rather than smooth arc, or a curve that doesn’t match the layout originally marked out.
This is a project where we lean strongly toward recommending professional installation, even for homeowners who’ve successfully handled straight paver projects before. Our guide on how to lay a paver walkway covers pattern and technique fundamentals that apply on straight sections, but curves introduce enough additional variables that the learning curve, no pun intended, is steep even for a motivated DIYer.
With over 15 years of building custom hardscapes across the Denver area, our team has cut and fitted enough curved walkways to know how to keep a curve looking intentional and smooth rather than patched together. Explore our paver patio services to see examples of curved and custom-shaped hardscape work.
Yes, significantly. Curved walkways require individual paver cutting, careful joint spacing management, and specialized edge restraint techniques that straight walkways don’t need.
Using smaller format pavers, like cobble-style units, with a curve-friendly pattern such as running bond reduces cutting significantly compared to trying to bend larger rectangular pavers around an arc.
Plan for roughly 15 to 20 percent extra material to account for cutting waste, compared to the 5 to 10 percent typically budgeted for a straight walkway.
It’s possible but considerably more difficult, since herringbone’s interlocking geometry assumes straight, consistent rows. Curve-friendly patterns using smaller pavers are generally easier to execute well.
Yes, typically 15 to 30 percent more for the same length and width, due to additional cutting, material waste, and labor time required to fit pavers individually along the arc.
Standard rigid edge restraints don’t bend around curves, so flexible edge restraint material designed for curves, or shorter segments of standard restraint anchored more frequently, are typically used instead.
A well-built curve adds real character to a yard, but it’s one of the more technically demanding walkway styles to execute cleanly, and small mistakes tend to show up more visibly than they would on a straight path.
Ridgewell Landscape and Design has been designing and building curved paver walkways across Denver, Broomfield, Parker, and the surrounding communities for over 15 years. If you’re picturing a curved path through your yard, reach out for a free quote and consultation, and let us help bring that layout to life.
Fresh Ideas From our experts
What Your Neighbors Are Saying
"They are the best. We have a small backyard and needed it to reflect a relaxing and enjoyable space. Chris used our ideas and came up with the perfect design. Then Francisco came with the cost projections and worked to accommodate our budget. He and his team then used their considerable construction expertise to create a space that’s an extension of our home where we spend a lot of time. Thank you for creating such a welcoming space."
"I am new to Colorado and hired Chris and Francisco to design and implement a plan for my new build house. From design to finish and followup they were beyond my expectations. They are in constant contact throughout the project and their crew is very hardworking. They followup when the project is finished and are always available for whatever questions you may have. I would highly recommend them, and I get many complements on the work they have done for me."
"We were thrilled with the end result of our brick paver patio refurbishment. We hired Chris, Francisco and their team to fix our sinking brick paver patio. It had been installed by a different landscaper, and after only 2 years it was collapsing. Boo hiss! Ridgewell Landscape and Design came in and saved the day! They discovered the original installation was done incorrectly, and that’s why it was collapsing. Their team worked hard and got the project done quickly and professionally. We are thrilled with the look and finish of the job! Bravo!!"