- Get A Free Consultation.
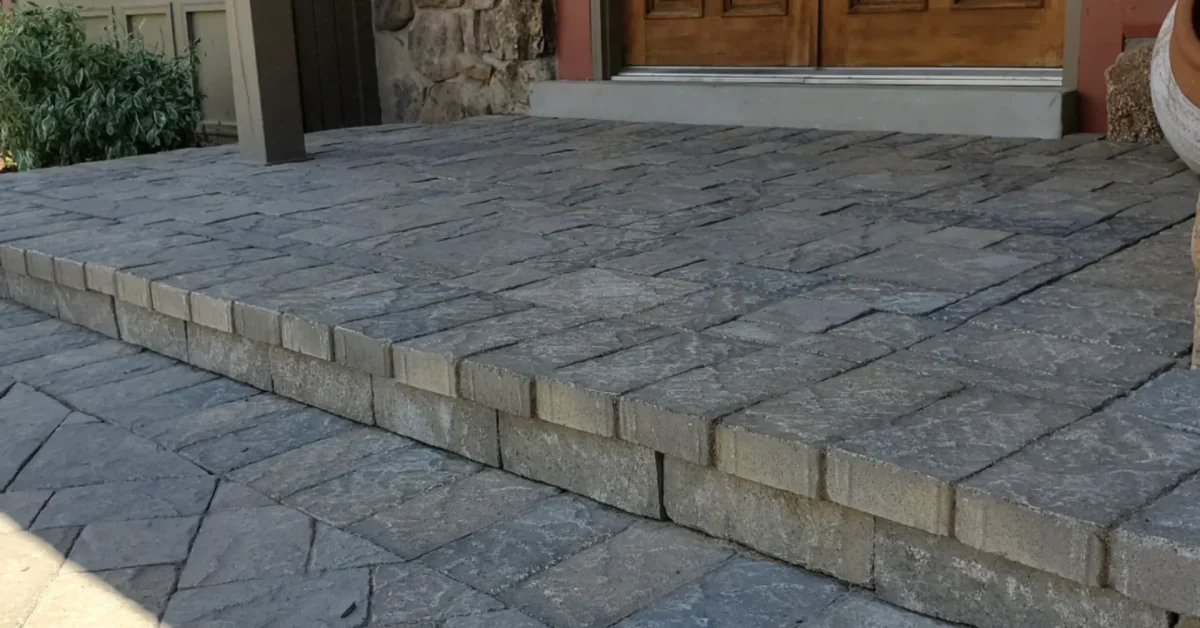
An existing concrete walkway that’s structurally sound but outdated or unattractive doesn’t necessarily need to be torn out before installing pavers. In many cases, pavers can be installed directly over concrete, using the existing slab as a stable base rather than starting excavation from scratch. This can save real time and cost compared to full removal and rebuild, but it only works when the concrete is actually in suitable condition, and the installation method, mortar-set or sand-set, needs to match your specific situation.
At Ridgewell Landscape and Design, we evaluate concrete-over-concrete paver projects across the Denver area, including Broomfield, Parker, and the surrounding communities, on a regular basis, and getting the assessment and method choice right upfront prevents a lot of problems down the line. This guide covers how to inspect your existing concrete, compares mortar-set versus sand-set installation methods, and addresses the height and clearance issues that come with building on top of an existing surface.
| Factor | Mortar-Set | Sand-Set |
| How pavers attach | Bonded directly to concrete with mortar or adhesive | Set into a sand bed, not directly bonded |
| Requires a rigid, crack-free base | Yes, essential | More forgiving of minor imperfections |
| Repair approach | Difficult, often requires breaking bond | Individual pavers can be lifted and reset |
| Height added | Lower, thinner overall buildup | Higher, needs a sand bed plus paver thickness |
| Best for | Excellent condition concrete, minimal height concerns | Concrete with minor flaws, more flexibility needed |
| Freeze-thaw performance | Can be more prone to cracking if concrete moves | Better tolerance for minor movement |
Mortar-set installation bonds pavers directly to the existing concrete surface, essentially treating the concrete as a rigid foundation similar to how tile is installed indoors. Sand-set installation uses a thin sand or specialized bedding layer between the concrete and the pavers, allowing slightly more flexibility and making individual paver repair more realistic down the line.
Minor surface cracks, hairline cracks that haven’t shifted or widened, are generally acceptable for either method, though they’re worth noting since they can sometimes telegraph through a mortar-set installation over time. Larger, wider cracks, especially any showing vertical displacement where one side sits higher than the other, are a bigger concern, since they suggest ongoing movement that will likely continue affecting whatever is built on top.
Walk the length of the concrete looking and feeling for any areas that rise or dip noticeably compared to the surrounding surface. Heaving, often caused by tree roots or frost activity, and settling, often caused by erosion or poor original base preparation, both indicate the concrete isn’t sitting on stable, consistent ground, which raises the risk of that instability showing up again in a new surface built on top.
Confirm that water isn’t pooling on the existing concrete after rain. Standing water indicates a drainage or grading issue with the slab itself, one that installing pavers on top won’t resolve and may actually worsen if the added height changes how water moves around the area.
If the concrete is structurally sound, no major cracking, minimal to no heaving or settling, and reasonable drainage, it’s generally a good candidate for either method. If it’s showing multiple significant issues, it may be more cost-effective in the long run to remove the existing concrete and build a proper paver walkway from a fully excavated base instead. Our general guide on how to build a paver walkway covers that full-removal approach if your concrete assessment points in that direction.
Mortar-set installation works best on concrete in excellent condition, minimal cracking, no heaving, good drainage, since the method relies on the concrete providing a genuinely stable, unmoving foundation. It also tends to be the better choice when height is a significant concern, since it adds less overall buildup than a sand-set approach requiring a full bedding layer.
Sand-set installation is generally the more forgiving choice, better suited to concrete with minor imperfections, some hairline cracking, or slight unevenness, since the sand layer can absorb small irregularities that would otherwise telegraph through a rigid mortar bond. It also allows for more realistic future repairs, since individual pavers can be lifted and reset without disturbing the surrounding installation the way a mortar-bonded paver typically requires.
For Mortar-Set Installation
For Sand-Set Installation
Thoroughly clean the existing concrete, removing any dirt, debris, oil stains, or loose material, since mortar bonds poorly to a dirty or contaminated surface.
Fill and seal any hairline cracks before installation, reducing the chance they telegraph through the new surface over time.
Spread mortar or paver adhesive using a notched trowel, working in manageable sections rather than covering the entire area at once, since mortar can begin setting before you’re ready to place pavers over it.
Place each paver into the wet mortar, tapping gently with a rubber mallet to seat it and checking level frequently as you work.
Let the mortar cure fully according to the product’s specifications before foot traffic or jointing work begins, typically at least 24 to 48 hours depending on conditions.
Once cured, fill joints with grout or polymeric sand depending on your paver spacing and design.
Clean thoroughly, removing debris and any loose material that could interfere with the sand bed sitting evenly across the surface.
Since there’s no soil to anchor edge restraints into, they need to be secured directly into the concrete using appropriate concrete anchors, establishing the boundary for your sand bed and pavers.
Add a thin bedding layer, either standard coarse sand or a specialized thin-set product designed for over-concrete applications, and screed it level across the surface.
Place pavers into the sand bed following your chosen pattern, tapping into position with a rubber mallet and checking level regularly. Our guide on how to lay a paver walkway covers pattern and technique fundamentals that apply here as well.
Sweep polymeric sand into the joints, mist to activate, and allow it to cure according to product instructions.
Both methods add height above the existing concrete surface, generally an inch or more depending on paver thickness and installation method, which needs to be checked against nearby doorways, thresholds, and any adjoining hardscape before starting.
If the walkway leads to an exterior door, measure the current clearance between the concrete surface and the bottom of the door before installation. Adding paver height on top of the concrete can reduce that clearance meaningfully, and in some cases create a tripping hazard or interfere with the door’s swing if not accounted for ahead of time.
Where the new paver surface meets an adjoining driveway, patio, or lawn area, confirm the height difference created by the added buildup doesn’t create an awkward or unsafe step. In some cases, a small transition detail, a beveled edge or a short connecting ramp, is needed to smooth out the height change where the new surface meets existing grade.
Building over existing concrete generally costs less than full removal and new base installation, since it skips the excavation and base compaction stages entirely. That said, the added labor for mortar work or specialized thin-set sand installation, along with the concrete assessment and any necessary crack repair, still represents a meaningful cost, and it’s worth getting a specific quote for this approach rather than assuming it will automatically be the cheaper option in every case. Our paver walkway cost guide covers general new-construction pricing that can serve as a useful comparison point.
If your assessment reveals significant cracking, heaving, or drainage problems, building over that concrete generally isn’t the more cost-effective long-term choice, even though it might seem like the faster, cheaper option upfront. In these cases, removing the concrete and building a proper paver walkway from a fully excavated and compacted base tends to produce a more durable, longer-lasting result.
With over 15 years of assessing and building both over-concrete and full-removal paver walkway projects across the Denver area, our team at Ridgewell Landscape and Design can help you determine which approach makes the most sense for your specific existing concrete. Explore our paver patio services to see examples of completed projects using both methods.
Yes, in many cases, as long as the concrete is in reasonably good condition without significant cracking, heaving, or drainage issues.
Mortar-set bonds pavers directly to the concrete using mortar or adhesive, while sand-set uses a sand bedding layer between the concrete and pavers, offering more flexibility and easier future repairs.
Generally an inch or more, depending on paver thickness and installation method, which should be checked against door clearances and adjoining surfaces before starting.
Often yes, since it skips excavation and base compaction, though the specific savings depend on the condition of the concrete and the installation method chosen.
Significant cracking with vertical displacement, noticeable heaving or settling, and persistent drainage problems all suggest removal and a full rebuild will produce a more durable result than building on top.
Not as easily as with a sand-set installation. Mortar-set pavers are more difficult to remove and reset individually without disturbing the surrounding bond.
Whether your concrete is a good candidate for building over or needs to come out entirely, getting an accurate assessment upfront saves you from a costly mistake either way.
Ridgewell Landscape and Design has been assessing and building paver walkways over both new and existing surfaces across Denver, Broomfield, Parker, and the surrounding communities for over 15 years. If you have an existing concrete walkway you’re considering building over, reach out for a free quote and consultation.
Fresh Ideas From our experts
What Your Neighbors Are Saying
"They are the best. We have a small backyard and needed it to reflect a relaxing and enjoyable space. Chris used our ideas and came up with the perfect design. Then Francisco came with the cost projections and worked to accommodate our budget. He and his team then used their considerable construction expertise to create a space that’s an extension of our home where we spend a lot of time. Thank you for creating such a welcoming space."
"I am new to Colorado and hired Chris and Francisco to design and implement a plan for my new build house. From design to finish and followup they were beyond my expectations. They are in constant contact throughout the project and their crew is very hardworking. They followup when the project is finished and are always available for whatever questions you may have. I would highly recommend them, and I get many complements on the work they have done for me."
"We were thrilled with the end result of our brick paver patio refurbishment. We hired Chris, Francisco and their team to fix our sinking brick paver patio. It had been installed by a different landscaper, and after only 2 years it was collapsing. Boo hiss! Ridgewell Landscape and Design came in and saved the day! They discovered the original installation was done incorrectly, and that’s why it was collapsing. Their team worked hard and got the project done quickly and professionally. We are thrilled with the look and finish of the job! Bravo!!"