- Get A Free Consultation.
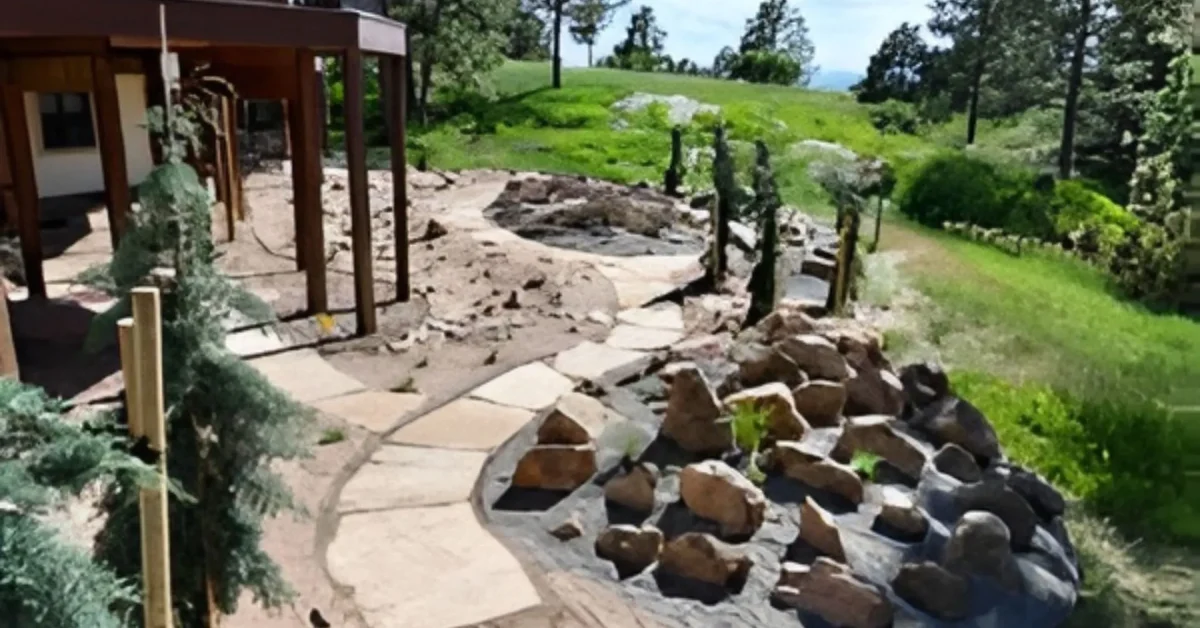
Building a paver walkway on level ground is forgiving. Building one on a slope is a different project entirely. Water moves differently, soil shifts differently, and a base that would hold up fine on flat ground can wash out or settle unevenly once gravity gets involved. None of that means it can’t be done well, it just means the margin for error is much smaller than it is on a flat path.
At Ridgewell Landscape and Design, we build sloped walkways across the Denver area, including Broomfield, Parker, and the surrounding communities, and slope is one of the first things we assess before recommending an approach. This guide covers the two main ways to handle a sloped walkway, stepped or gradual, along with the drainage, erosion, cost, and material considerations that make or break a sloped installation over time. If you’re starting from scratch and want the fundamentals first, our general guide on how to build a paver walkway covers the base steps that still apply here, just adapted for a grade.
| Factor | Stepped Walkway | Gradual Sloped Walkway |
| Best for slope grade | Steeper slopes, generally above 10 percent | Gentle to moderate slopes, generally under 10 percent |
| Walkability | Requires stepping up or down at intervals | Continuous, no steps to navigate |
| Drainage handling | Easier to manage water at each landing | Requires careful cross-slope grading |
| Construction complexity | Higher, needs risers and landings | Moderate, needs careful base grading |
| Accessibility | Harder for wheelchairs, strollers, wheelbarrows | Better for wheeled access if graded correctly |
A rough way to think about it: if your slope rises more than about one foot for every ten feet of walkway length, a stepped design is usually safer and more comfortable to use. Below that, a gradually sloped walkway can often be built without steps, as long as the grading and drainage are handled correctly.
On flat ground, water sits where it lands unless you grade it away deliberately. On a slope, water is already moving, and it will keep moving through, under, and around your walkway unless you plan for where it’s supposed to go. This is the core difference that drives almost every decision in this guide. A poorly planned sloped walkway doesn’t fail because the pavers were laid wrong, it fails because water found a path underneath or beside the base that nobody accounted for.
This is also why cost, base depth, and material choice all behave a bit differently on a slope than they do on flat ground, which is worth understanding before you start pricing out the project.
Before deciding on an approach, measure the slope using a level and a straight board, or a laser level for a longer walkway. Knowing your actual grade, not just an estimate by eye, determines whether a gradual approach is realistic or whether you’re really looking at a stepped design. To measure by hand, hold one end of a straight board at the top of the slope and a level on top of it, then measure the height at the low end once the board reads level. Divide that height by the board’s length to get your percentage grade.
A 5 percent grade is barely noticeable underfoot and works well for a gradual walkway. A 10 percent grade starts to feel like a noticeable incline, and is generally the upper limit for a no-step design without adding traction texture to the paver surface. Anything steeper than that is where steps typically become the safer and more comfortable choice.
Unlike a flat walkway, excavation on a slope needs to follow the existing grade rather than flattening it out completely. The goal is a consistent, gentle slope along the walkway’s length, typically no steeper than what’s comfortable to walk on without extra traction, generally under an 8 to 10 percent grade for a no-step design.
Sloped walkways benefit from a slightly deeper base than flat ones, since the base has more work to do resisting gravity and water movement. Compact in thinner layers than you would on flat ground, checking that each layer holds firm before adding the next, since a base that isn’t fully compacted on a slope tends to creep downhill over time rather than staying put. Our guide to proper paver base depth covers base fundamentals in more detail, though sloped applications generally call for extra depth and more careful layer by layer compaction beyond what’s needed on flat ground.
In addition to the downhill slope, the walkway needs a slight cross-slope, a gentle tilt from one side to the other, so water sheds off to one side rather than running straight down the center of the path. This cross-slope is easy to miss if you’re only thinking about the uphill to downhill grade.
Standard edge restraints can work on gentle slopes, but steeper gradual slopes benefit from restraints anchored more frequently and, in some cases, backed by a small buried curb of compacted base material to prevent the whole installation from creeping downhill after repeated freeze and thaw cycles.
On any slope, even a gentle one, a smooth, polished paver surface becomes noticeably more slippery when wet or icy than it would on flat ground. Textured or tumbled paver finishes provide meaningfully better footing on a grade, and it’s worth prioritizing traction over a perfectly smooth look for any walkway with a noticeable incline.
Comfortable outdoor steps typically use a riser height between 4 and 7 inches, with a landing depth of at least 12 inches, though wider is more comfortable for most people. Consistency matters more than the exact numbers, uneven riser heights between steps are one of the most common tripping hazards in outdoor stepped walkways.
Each step requires cutting a level platform into the slope, essentially creating a small terrace for that section of the walkway. This is more labor intensive than a gradual slope, since you’re excavating and compacting a separate level section for every step rather than one continuous grade.
Steps on a slope generally need something holding soil back behind each riser, whether that’s a paver riser itself, a small block, or a short retaining wall section. Without this, soil from the uphill side will gradually migrate onto the step below, burying the front edge over time. For steeper slopes where the height gain is more significant, a proper retaining wall built alongside the steps does a much better job of managing this than relying on the steps alone.
If a stepped walkway curves or runs for a long vertical distance, break it up with a wider landing every so often. This gives people a place to pause and also interrupts water flow, which otherwise builds momentum running straight down a long, uninterrupted run of steps.
Because uneven footing and elevation changes are involved, low-voltage lighting along a stepped walkway is worth considering beyond just aesthetics. Marking each riser edge with a small light fixture significantly reduces the chance of a missed step at night, which is a real safety consideration that flat walkways don’t usually require.
Drainage failures on flat walkways usually show up as pooling water. On a slope, drainage failures show up as erosion, undermined base material, and eventually a walkway that shifts, sinks, or separates from the ground around it. Getting this right isn’t optional the way it can sometimes be on a flat path.
Water running parallel to a sloped walkway, funneled by the path itself, picks up speed and erosive force the longer it travels. Grading the surrounding yard so water sheds off to the sides at regular intervals, rather than following the walkway downhill, reduces this significantly.
For steeper slopes or areas where surrounding soil sheds a lot of water toward the walkway, a French drain running alongside the path intercepts water before it reaches the base material. This is one of the most effective single additions for protecting a sloped walkway’s long-term stability.
Bare soil next to a sloped walkway erodes easily, and that erosion can undermine the edge restraints over time. Groundcover plantings, mulch, or small retaining elements alongside the path help keep surrounding soil in place, which in turn protects the walkway’s edges from being undercut. Drought-tolerant groundcover in particular does well on slopes since it establishes strong root systems without requiring heavy irrigation that could otherwise contribute to erosion. Our guide on xeriscape landscaping covers plant choices that work well for exactly this kind of slope stabilization.
A sloped walkway benefits from an occasional visual check after major rain or snowmelt events, looking for signs of soil washing away from the edges or water pooling somewhere unexpected. Catching a small erosion issue early is far easier than repairing a section that’s already settled or shifted.
Sloped walkways generally cost more than flat ones of the same length, mainly due to additional excavation, deeper base requirements, and the extra labor involved in grading or terracing. Stepped designs add further cost because of the terracing, retaining elements, and precision required for consistent riser heights. Our broader paver walkway cost guide breaks down general per square foot pricing, though sloped and stepped projects typically land toward the higher end of that range, and sometimes above it, once drainage work and retaining elements are factored in.
Sloped and stepped walkways need a bit more ongoing attention than flat ones. Joint sand tends to wash out faster on a grade, particularly on steeper sections, so checking and topping off joints after heavy rain is worth doing more frequently than on a flat path. Stepped walkways also benefit from periodically checking that soil hasn’t crept over the front edge of any step, which is a sign the retaining element behind it may need reinforcing.
A flat paver walkway has real margin for error. A sloped one does not. Grading mistakes that would be a minor cosmetic issue on flat ground can become structural problems on a slope, whether that’s water finding its way under the base, soil eroding out from under an edge restraint, or an unevenly compacted base creeping downhill after a single freeze and thaw cycle. Steps add another layer of difficulty, since riser consistency and proper retaining behind each landing require both precise measurement and an understanding of how soil behaves once it’s cut into a slope.
This is a project where we generally recommend bringing in a professional, even for homeowners who are comfortable handling a flat walkway themselves, covered in our general guide on how to build a paver walkway. The stakes for getting drainage and base work wrong are simply higher on a slope, and the fixes tend to be more disruptive and expensive than they would be on flat ground.
With over 15 years of building on Colorado’s varied terrain, including plenty of sloped and terraced properties across the Denver area, our team has developed a good sense for how a given slope will behave and what it takes to keep a walkway stable on it for the long run. Explore our landscape design and installation services to see the kind of sloped and terraced projects we’ve built.
As a general guideline, a slope steeper than about 10 percent, roughly one foot of rise for every ten feet of length, is usually safer and more comfortable as a stepped design rather than a continuous gradual slope.
It’s possible for gentle slopes, but the risk of drainage or base failure increases significantly with slope grade, which is why we generally recommend professional help for anything beyond a mild grade.
Sloped walkways generally benefit from a slightly deeper, more thoroughly compacted base than flat walkways, since the base has to resist both foot traffic and the added force of gravity and water movement.
Not always, but for slopes with significant height change, a retaining wall alongside the steps does a much better job of holding back soil than the steps alone, and it prevents soil from gradually burying the front edge of each step.
Drainage and erosion are the biggest risks. Water that isn’t properly directed away from the walkway can undermine the base or edge restraints, leading to shifting, sinking, or separation over time.
For steeper slopes or yards where surrounding soil sheds a lot of water toward the path, a French drain alongside the walkway is one of the most effective ways to protect the base from erosion long term.
Yes, typically. Extra excavation, deeper base requirements, and additional labor for grading or terracing usually push sloped and stepped walkways toward the higher end of typical paver walkway pricing.
Drought-tolerant groundcover with strong root systems tends to work best, since it helps stabilize soil on either side of the path without requiring heavy irrigation that could contribute to erosion.
Slopes add real complexity to what would otherwise be a straightforward project, and getting the grading and drainage wrong tends to show up as a bigger problem than it would on flat ground.
Ridgewell Landscape and Design has been building stepped and sloped walkways across Denver, Broomfield, Parker, and the surrounding communities for over 15 years. If your yard has a slope you’re trying to work with, reach out for a free quote and consultation, and let us help you figure out the right approach for your property.
Fresh Ideas From our experts
What Your Neighbors Are Saying
"They are the best. We have a small backyard and needed it to reflect a relaxing and enjoyable space. Chris used our ideas and came up with the perfect design. Then Francisco came with the cost projections and worked to accommodate our budget. He and his team then used their considerable construction expertise to create a space that’s an extension of our home where we spend a lot of time. Thank you for creating such a welcoming space."
"I am new to Colorado and hired Chris and Francisco to design and implement a plan for my new build house. From design to finish and followup they were beyond my expectations. They are in constant contact throughout the project and their crew is very hardworking. They followup when the project is finished and are always available for whatever questions you may have. I would highly recommend them, and I get many complements on the work they have done for me."
"We were thrilled with the end result of our brick paver patio refurbishment. We hired Chris, Francisco and their team to fix our sinking brick paver patio. It had been installed by a different landscaper, and after only 2 years it was collapsing. Boo hiss! Ridgewell Landscape and Design came in and saved the day! They discovered the original installation was done incorrectly, and that’s why it was collapsing. Their team worked hard and got the project done quickly and professionally. We are thrilled with the look and finish of the job! Bravo!!"